

In this course, we will study the How to Install Java and how to Set Environment Variables in java and Installation of Java in Windows Operating System
How to install Java?
Java is supported in many platforms like Windows, Linux, Solaris, etc. All these platforms have their own installation methods. We will not be covering installation procedures for all the platforms that support Java but only Windows operating system for the moment.
Installation of Java in Windows Operating System
Whether you are using a 32-bit operating system or a 64-bit operating system. Both of them have a similar installation procedure.
Step 0: Check if you already have Java installed on your computer.
Most of today’s desktop applications require Java to work. They require Java to be installed on the host system to properly get executed. So if you have one of those applications in your computer then you probably might have Java already installed on your computer.
To confirm whether you have Java installed on your computer or not, follow these steps -
- Hold the Windows key and press R on your keyboard. This will open up the Run dialog box.
- Now enter cmd in that dialog box and click OK. This is open to the Command Prompt window.
- In the Command Prompt, type java -version and press Enter on your keyboard.
- If you see this type of output below with java version, then congratulations you have Java installed on your computer and no need to continue to further steps.
- If you don’t see an output similar to the above image, then follow the next step.
Step 1: Know whether you have a 32-bit or 64-bit operating system.
Knowing your operating system type is important for installing Java. It comes for both 32-bit and 64-bit operating systems. If you know the type of operating system you have to install Java then you can move to the next step. If you don’t know your system type or having trouble finding it out then follow these simple steps:
- Open File Explorer that comes with your Windows operating system.
- On the left side panel, Right-click on This PC to open the context menu and then click on Properties.
- This will open up the System Properties of your computer. Now, under the Systemsection, check out the System type of your computer.
Step 2: Download Java Development Kit (JDK)
- Head to the official Java download website to browse through the JDK packages. Link: (https://www.oracle.com/java/technologies/javase/javase-jdk8-downloads.html)
- Scroll down the page in the link given above and click on the appropriate link based on the operating system you wish to install.
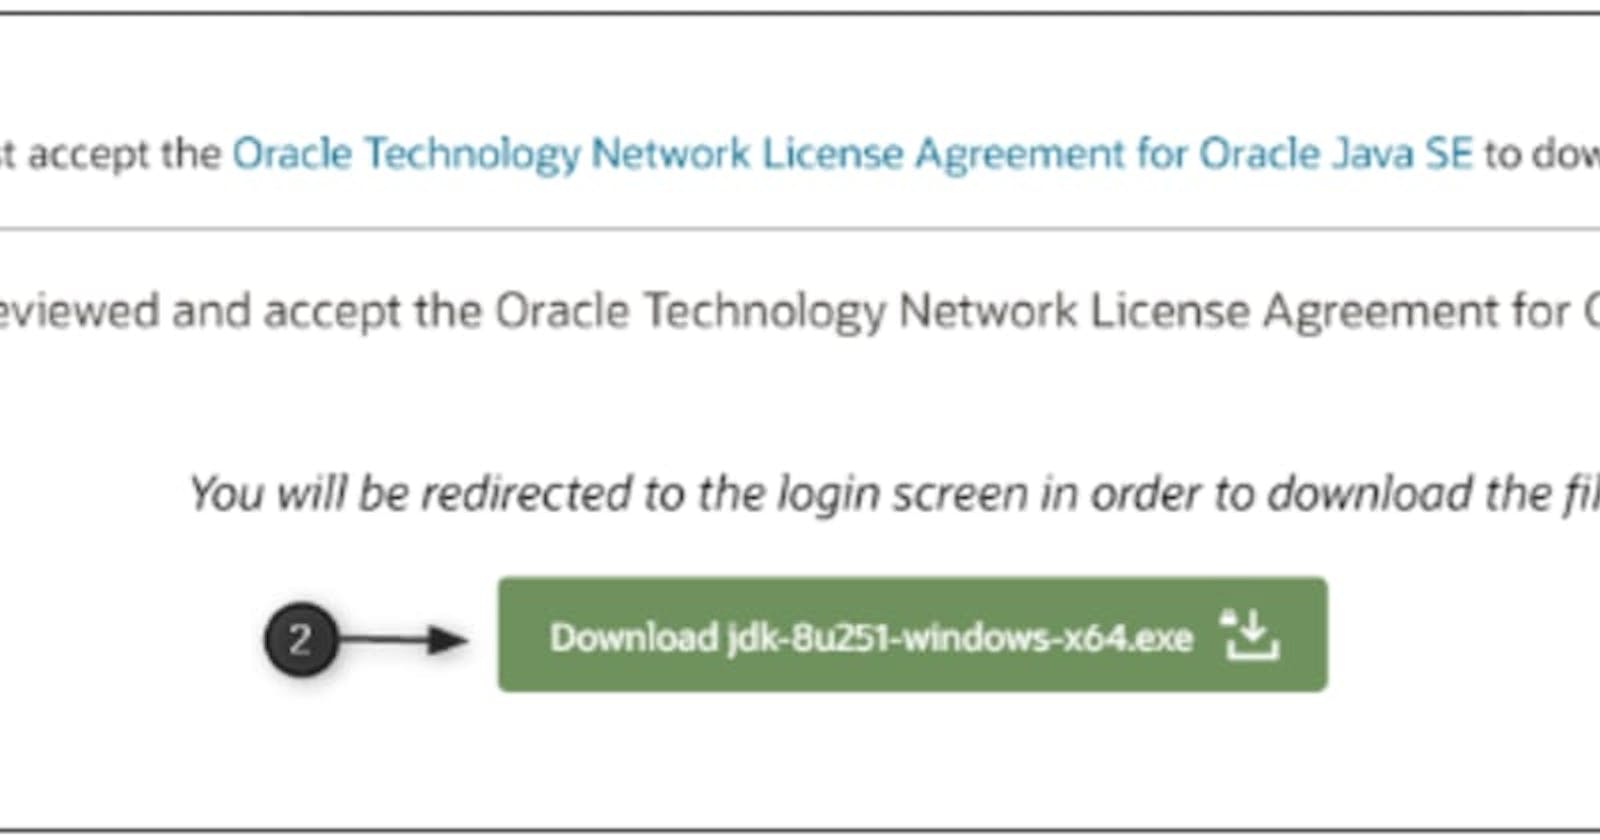
- A pop window may appear to accept the license agreement. If you wish to read it then you can or just select the checkbox accepting the license agreement and click the Download button.
- You will then be redirected to a login page where you will have to sign in to start the download.
- Don’t have an Oracle Account? Follow this link to create one. Link: (profile.oracle.com/myprofile/account/create..)
- Already have an Oracle Account? Then fill out the username and password and sign in to start the download.
- Once downloaded, open the installer package and follow the installation wizard. During installation, you may change the installation path if needed. But the default settings during installation is recommended.
After the completion of the installation, just repeat Step 0 to check whether the installation is successful.
Setting up Environment Variable
Environment variables are set to enable the system to access externally installed applications or executables. These variables are in the form of a Key-Value pair. They are generally used by the system and other applications to access an external application or program that does a specific task.
We will set environment variables to make sure our system has access to Java. Also, it will enable us to use Java executables globally in a system
How to set environment variables for Java in Windows 10?
- Locate the Java installation on your PC. If you have installed Java using default options, then it can be located in one of the following locations:
- Open File Explorer that comes with your Windows operating system.
- On the left side panel, Right-click on This PC to open the context menu and then click on Properties.
- This will open up the System Properties of your computer. On the left panel, click on Advanced system settings.
- Under the Advanced tab, click on Environment Variables.
- Under the System Variables section, locate the Path variable and double-click on it. (If there is no Path variable then create a new one)
- Click on New and paste the location of the bin folder of the Java installation from step 1 and click on OK.
- You have successfully set the Java environment variable. Now you may close all the other dialog boxes that were opened since step 1.
| C:/Program Files/Java/jdk-<version> /bin - For 64-bit OS C:/Program Files (x86)/Java/jdk-<version>/bin - For 32-bit OS |
Copy the location of the bin folder of the Java installation which contains java and javac.